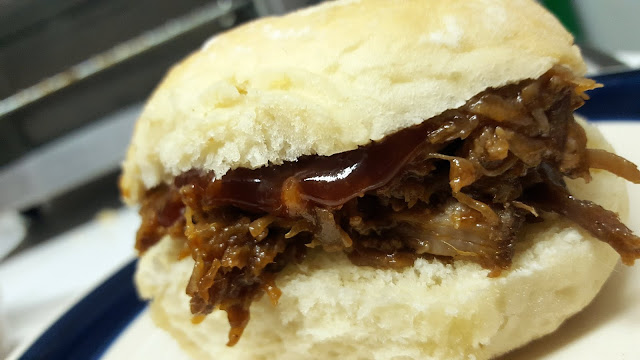
Yum
This recipe started it's life as a slow cooker loaded baked potato soup I found online. You were supposed to use the slow cooker to boil the potatoes for hours, and then towards the end combine it all to make the soup. I almost immediately found that while that works, it was actually much more convenient for me to just boil the potatoes, and do the whole thing on the stove top in under two hours. If you want an even faster cooking time, this is a great way to use a couple cups of leftover roasted potato wedges from a previous meal. The original recipe was also more about giving you a potato soup that had loaded baked potato toppings served as a garnish, whereas overtime, I found that actually incorporating those flavors into the soup just...tastes better. And, if you do happen to have some leftover cheese, bacon, chives and sour cream, you can still do a fun loaded baked potato look on top of your individual bowls of soup.
--------------------------------
You will need an Immersion Blender for this recipe. This can be substituted with a regular blender, if done in small batches and pulsed a couple times.
--------------------------------
1 White/Yellow Onion
1 Quart Chicken Broth
4 Cloves Garlic
1/4th Cup Butter (half a stick)
2 1/2 tsp. Kosher Salt
1 tsp. Black Pepper
1 Cup Heavy Cream
1/2 Cup Sharp Cheddar, Shredded (More for Garnish)
1/2 Cup Colby Jack, Shredded
3 Tbsp. Chives, Chopped
1 Cup Sour Cream (More for Garnish)
8 Slices of Thick-Cut Bacon
--------------------------------
2. Once you get your potatoes boiling, fry up your bacon. You want it to be fairly crisp, but not burnt, we're going for bacon bits here. Once it reaches that perfect consistency, pull out and leave to drain on a plate covered with some paper towels to remove excess grease. Drain out excess bacon grease from your pan (you can save it in a mason jar in your fridge like I do!) and set aside.
3. Dice your onion, hopefully while the potatoes are boiling and your bacon is frying, or before you started. Get your pan with leftover bacon grease back on medium heat, and once hot, throw in your diced onion and season to taste with your favorite seasoning salt, I use Johnny's. Cook the onions until soft and translucent, about 5 minutes.
4. Take your bacon strips and set them as best as you can on top of each other. Use your knife to chop them into small bacon crumbles. Set aside.
5. Once potatoes are fork tender, drain them and dump the water. Use this pot to make your soup. Add to your potatoes the Chicken Broth, Butter, Onion, Garlic, Salt and Pepper, put this pot on medium heat. Bring to a boil, then turn down to low and let simmer for about 20 minutes.
6. At this point stir in the Heavy Cream, Shredded Cheeses, Sour Cream and about 3/4ths of your Bacon bits. Cook for another 10-15 minutes, stirring occasionally to make sure everything gets to know each other.
7. Turn off the heat and use your Immersion Blender to gently blend your soup up. It will go from one shade of beige to another shade of beige, but thicker. Blend for short bursts to help break up some of the potatoes and bacon, but you're looking to leave some intact as well.
8. Once blended, stir in about half of your chives and you are ready to serve.
9. When serving, top your individual bowls of soup with a dollop of sour cream, and a sprinkling of shredded cheddar, reserved bacon bits and chives.
10. Enjoy!
--------------------------------
Lots of ways to vary up this recipe, as a creamy soup base with cheese and bacon can go a lot of fun ways.
1. Experiment with cheese combos: I always use cheddar, but the other half cup I like playing with. I listed my second 1/2 a cup as Colby Jack because it's ol' reliable, but I've also had a lot of success with shredded Smoked Gouda. Any cheese that melts well can be tried as a substitution.
2. Experiment with Bacon: Same idea as cheese, most bacon will taste good here, might as well play around with different flavor profiles and see which one you like the best. When I make this, I am almost always using a thick cut, Applewood Smoked Pepper Bacon.
3. Use different/roasted potatoes! This was born out of me working in a kitchen that often has a surplus of leftover roasted yellow and red potato wedges and not wanting to waste them. I listed Russets in the recipe because they are the cheapest to get and taste great in this recipe...but yellow potatoes can really give you an extra "buttery" flavor in the soup. They would work great either half and half with russets or fully substituted for an extra rich flavor. Also, if you want to simply roast potatoes for a dinner side dish, dice up your potatoes of choice, combine olive oil, some thyme, rosemary, parsley and a little kosher salt in a bowl and toss potatoes to combine. Roast at 425 degrees for about an hour and bam! easy dinner side dish, and if you end up with at least two cups of leftovers you can save yourself 20 minutes in this recipe and just start at Step 2.
--------------------------------
This recipe started it's life as a slow cooker loaded baked potato soup I found online. You were supposed to use the slow cooker to boil the potatoes for hours, and then towards the end combine it all to make the soup. I almost immediately found that while that works, it was actually much more convenient for me to just boil the potatoes, and do the whole thing on the stove top in under two hours. If you want an even faster cooking time, this is a great way to use a couple cups of leftover roasted potato wedges from a previous meal. The original recipe was also more about giving you a potato soup that had loaded baked potato toppings served as a garnish, whereas overtime, I found that actually incorporating those flavors into the soup just...tastes better. And, if you do happen to have some leftover cheese, bacon, chives and sour cream, you can still do a fun loaded baked potato look on top of your individual bowls of soup.
--------------------------------
Special Equipment
You will need an Immersion Blender for this recipe. This can be substituted with a regular blender, if done in small batches and pulsed a couple times.
--------------------------------
Ingredients
6 Large Russet Potatoes1 White/Yellow Onion
1 Quart Chicken Broth
4 Cloves Garlic
1/4th Cup Butter (half a stick)
2 1/2 tsp. Kosher Salt
1 tsp. Black Pepper
1 Cup Heavy Cream
1/2 Cup Sharp Cheddar, Shredded (More for Garnish)
1/2 Cup Colby Jack, Shredded
3 Tbsp. Chives, Chopped
1 Cup Sour Cream (More for Garnish)
8 Slices of Thick-Cut Bacon
--------------------------------
Directions
1. Dice your potatoes, leaving the skins on. Cover in a pot with cold water until potatoes are fully submersed. Add 1 tsp. kosher salt for each quart of water used. Bring to a boil and then simmer. It should take around 20 minutes, or until a fork will easily pierce a potato, but check in around every 5 minutes or so until done.2. Once you get your potatoes boiling, fry up your bacon. You want it to be fairly crisp, but not burnt, we're going for bacon bits here. Once it reaches that perfect consistency, pull out and leave to drain on a plate covered with some paper towels to remove excess grease. Drain out excess bacon grease from your pan (you can save it in a mason jar in your fridge like I do!) and set aside.
3. Dice your onion, hopefully while the potatoes are boiling and your bacon is frying, or before you started. Get your pan with leftover bacon grease back on medium heat, and once hot, throw in your diced onion and season to taste with your favorite seasoning salt, I use Johnny's. Cook the onions until soft and translucent, about 5 minutes.
4. Take your bacon strips and set them as best as you can on top of each other. Use your knife to chop them into small bacon crumbles. Set aside.
5. Once potatoes are fork tender, drain them and dump the water. Use this pot to make your soup. Add to your potatoes the Chicken Broth, Butter, Onion, Garlic, Salt and Pepper, put this pot on medium heat. Bring to a boil, then turn down to low and let simmer for about 20 minutes.
6. At this point stir in the Heavy Cream, Shredded Cheeses, Sour Cream and about 3/4ths of your Bacon bits. Cook for another 10-15 minutes, stirring occasionally to make sure everything gets to know each other.
7. Turn off the heat and use your Immersion Blender to gently blend your soup up. It will go from one shade of beige to another shade of beige, but thicker. Blend for short bursts to help break up some of the potatoes and bacon, but you're looking to leave some intact as well.
8. Once blended, stir in about half of your chives and you are ready to serve.
9. When serving, top your individual bowls of soup with a dollop of sour cream, and a sprinkling of shredded cheddar, reserved bacon bits and chives.
10. Enjoy!
--------------------------------
What I Could Do Differently
Lots of ways to vary up this recipe, as a creamy soup base with cheese and bacon can go a lot of fun ways.
1. Experiment with cheese combos: I always use cheddar, but the other half cup I like playing with. I listed my second 1/2 a cup as Colby Jack because it's ol' reliable, but I've also had a lot of success with shredded Smoked Gouda. Any cheese that melts well can be tried as a substitution.
2. Experiment with Bacon: Same idea as cheese, most bacon will taste good here, might as well play around with different flavor profiles and see which one you like the best. When I make this, I am almost always using a thick cut, Applewood Smoked Pepper Bacon.
3. Use different/roasted potatoes! This was born out of me working in a kitchen that often has a surplus of leftover roasted yellow and red potato wedges and not wanting to waste them. I listed Russets in the recipe because they are the cheapest to get and taste great in this recipe...but yellow potatoes can really give you an extra "buttery" flavor in the soup. They would work great either half and half with russets or fully substituted for an extra rich flavor. Also, if you want to simply roast potatoes for a dinner side dish, dice up your potatoes of choice, combine olive oil, some thyme, rosemary, parsley and a little kosher salt in a bowl and toss potatoes to combine. Roast at 425 degrees for about an hour and bam! easy dinner side dish, and if you end up with at least two cups of leftovers you can save yourself 20 minutes in this recipe and just start at Step 2.
--------------------------------


